How you benefit
- Time saving when changing inserts and ejector set directly on the injection moulding machine
- Thanks to ready-to-use change inserts, machining of the cavity can begin immediately
- New projects are paid off in a short time, as only inserts need to be ordered and machined

Mould sizes and change inserts
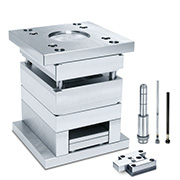
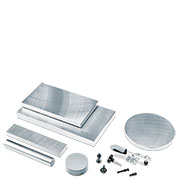
We offer ready-to-use change inserts in the material grades 1.2311, 1.2714HH and 3.4365. For further material grades, refer to our matching NF 2660 inserts.
| Mould size | W | L |
 | 156 | 196 |
156 | 246 | |
196 | 246 | |
196 | 296 | |
246 | 296 | |
246 | 346 | |
296 | 346 |
| Change inserts | W | L | T |
 | 100 | 140 | 25/32/40/50 |
100 | 190 | 25/32/40/50 | |
130 | 180 | 32/40/50/60 | |
130 | 230 | 32/40/50/60 | |
170 | 220 | 40/50/60/70 | |
170 | 270 | 40/50/60/70 | |
210 | 260 | 50/60/70/80 |
Change the insert in a few steps

Step 1
Uncouple the ejector set from the machine with the coupling (1) or screw connection (2). Remove the fastening screws (3) on the inserts.

Step 2
Loosen the screws (4). Pull off the positioning wedges with the help of the set screw (5).

Step 3
Pull out the change insert with the attached ejector set using the FW 1500 mounting device or screws.

Step 4
Put in the new change insert and tighten the fastening screws (3) slightly. Turn the set screw (5) to its initial position. Tighten the positioning wedges with screws (4).

Step 5
Tighten the change inserts with screws (3). Couple the ejector set to the machine.
Design wizard for change moulds
Complete mould bases and die sets, assistance in the selection of suitable components, and more with just a few clicks – our convenient change mould wizard is there to support you both in the web shop and in our offline shop.
- Perfectly matched configuration options
- CAD data available immediately after configuration
- Simple and intuitive handling


 © 2024 by Meusburger Georg GmbH & Co KG | All rights reserved

 Česká republika [CS]
 Danmark [DA]
 Deutschland [DE]
 España [ES]
 France [FR]
 India [EN]
 Italia [IT]
 Magyarország [HU]
 México [ES]
 Nederland [NL]
 Polska [PL]
 Portugal [PT]
 România [RO]
 Schweiz [DE]
 Slovenija [SL]
 Srbija [SR]
 Suomi [FI]
 Sverige [SV]
 Türkiye [TR]
 United Kingdom [EN]
 USA [EN]
 Österreich [DE]
 Ελλάδα [EL]
 България [BG]
 Росси́я [RU]
 华 [ZH]